Monday, May 19, 2014

Rustique Medallion Quilt by Emily Herrick

I had the honor of quilting this fabulous quilt for Emily Herrick to hang at International Quilt Market this past weekend. Her new fabric line is called Rustique and I LOVE it. Her colors are so saturated, and her geometric prints are just fantastic. This is one of the new lines with deer in it. Did you see pictures of Harvey in her booth? Talk about patchwork!


I had SO MUCH FUN quilting this. The design had so many areas that just screamed for different quilting designs. In the borders I did s-curves in the direction of the chevrons, and a little flower in the center square. The sashings all had ribbon candy quilting.

I kind of felt like Angela Walters quilting these motifs dot-to-dot style.

The flying geese got some continuous curve quilting. The background had tiny swirls. Aren't those fabrics fantastic?

In the center star medallion I repeated the s-curve quilting that I did in the top and bottom borders, tying it all together.
I absolutely love how this quilt turned out, and I especially loved seeing pictures of it hanging in Emily's booth. Thanks Emily for asking me to do this for you!

Friday, May 16, 2014

Blogger's Quilt Festival: Prairie Petals Quilt in Birch Farm

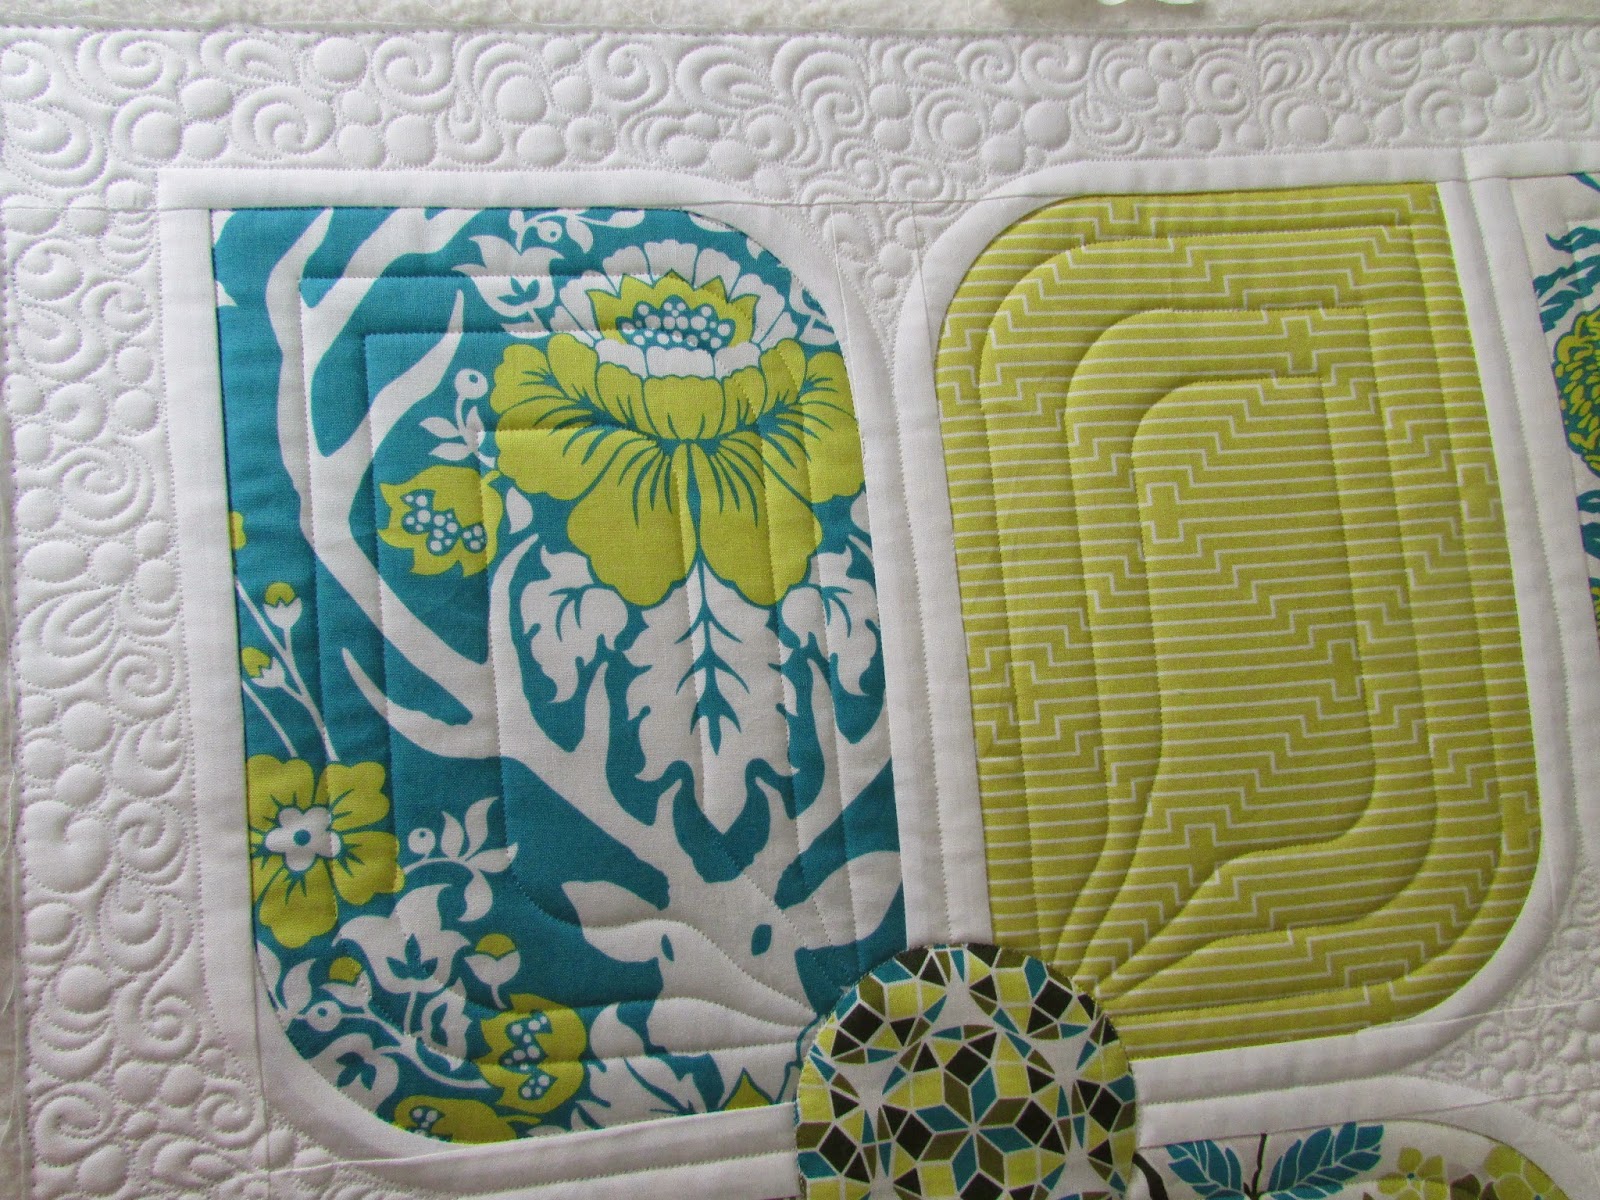
Are you at Quilt Market? Me neither. I did have the opportunity to make a quilt to go to Market, and I'm excited to enter it in the Blogger's Quilt Festival. This quilt was designed by Joel Dewberry to highlight his new fabric line, Birch Farm. I'm pretty sure the fabric will be available in July. This is good news for Deer Valley fans--the antler damask print is back in new colors!

 I didn't get any photos of the finished quilt, as Joel's wife Laurie literally pulled into the driveway to pick up the quilt as I was cutting the last threads from the binding. My friend JaNean found a pic of it all finished on Instagram--you can see it here. (Thanks again, JaNean!) Luckily I did get some pictures the night before after finishing the quilting.

I used some drunkard's path templates to cut the curved edges without breaking up the large prints. It would have worked to applique them as well, but this was faster! The design reminds me a lot of dogwood blooms, although not exactly.
 The goal in quilting this was to not detract from the fabrics at all, so I did a simple echo inside the petals using a clear monofilament thread, and stitched in the ditch at the same time.


 The blocks have a 1" sashing, so I quilted a line straight down the middle and curving 1/2" around the edges to give the effect of white edges on the flower petals. I did teeny pebbles, swirls, and clamshells in the diamond shapes between the flowers. That space is less than 3" square. I did a similar design in the 2" wide border, but a little larger.

This picture shows the quilt in progress, still needing two sashings and borders, but shows most of the design better than other photos I got. I really like the flowers.

I fussy-cut each of the center circles in an attempt to optimize the fabrics. There are some FABULOUS geometrics in this line and those were especially fun to fussy-cut.

A little more detail, during the quilting.

The quilt finished up at 51" by 72", which technically makes this go in the large quilt category in the festival. I'd call it more of a medium, but that's okay.

It was such an honor to be asked to make this quilt. I especially loved being able to do the tiny detail quilting--I don't get that opportunity very often with my current client base, so it was nice to change things up a bit. I love how this turned out, and I hope that Birch Farm is wildly successful at Market and after. If you happen to see any more pictures of this quilt there, please let me know! I'd love to see them too!

Blogger's Quilt Festival: Rainbow Dresden Ripples

Welcome to my little corner of the Blogger's Quilt Festival! Thanks so much to Amy for hosting again!

I've been quiet on the blog lately, but I'm so thrilled to share this quilt with you! I've had the design in my head for about two years, and it has been wonderful to see it all come together. This entry is part of the ROYGBIV Quilts Category in the festival.

 To make this quilt I used two identical Kona Jelly Rolls and a dresden ruler. The whole thing is made with straight seams, even though it gives the look of curves. I'm planning to write a pattern for this but it's kind of intimidating! I hope I can get past the intimidation soon and just do it.

 I used a fun black and white print for the binding.

The back is Peppered Cotton by Studio E in charcoal. It's SO SOFT! It's just a little heftier than other shot cottons, which I think is a good thing. I love how all of the quilting shows up so well on the back.


Each of the 40 colors is quilted with a different design.


I matched the thread colors as well as I could--there were a lot of thread changes for this one!


I had SO MUCH FUN quilting this. I didn't have time to get bored with any of the designs. One of my favorites was the geometric Greek key design just below.


The top took 20 hours to piece over a 3-day marathon sewing weekend and it took 10.5 hours to quilt, including stitching in the ditch on the whole quilt. I absolutely love how it turned out! This is one of mr favorite quilts ever.

I'm also linking up to Finish It Up Friday today.

Thanks for stopping by!


Friday, February 21, 2014

Finished: Dragons Quilt

I've been trying to figure out what to call this, and I just can't come up with anything clever. So Dragons Quilt it is.

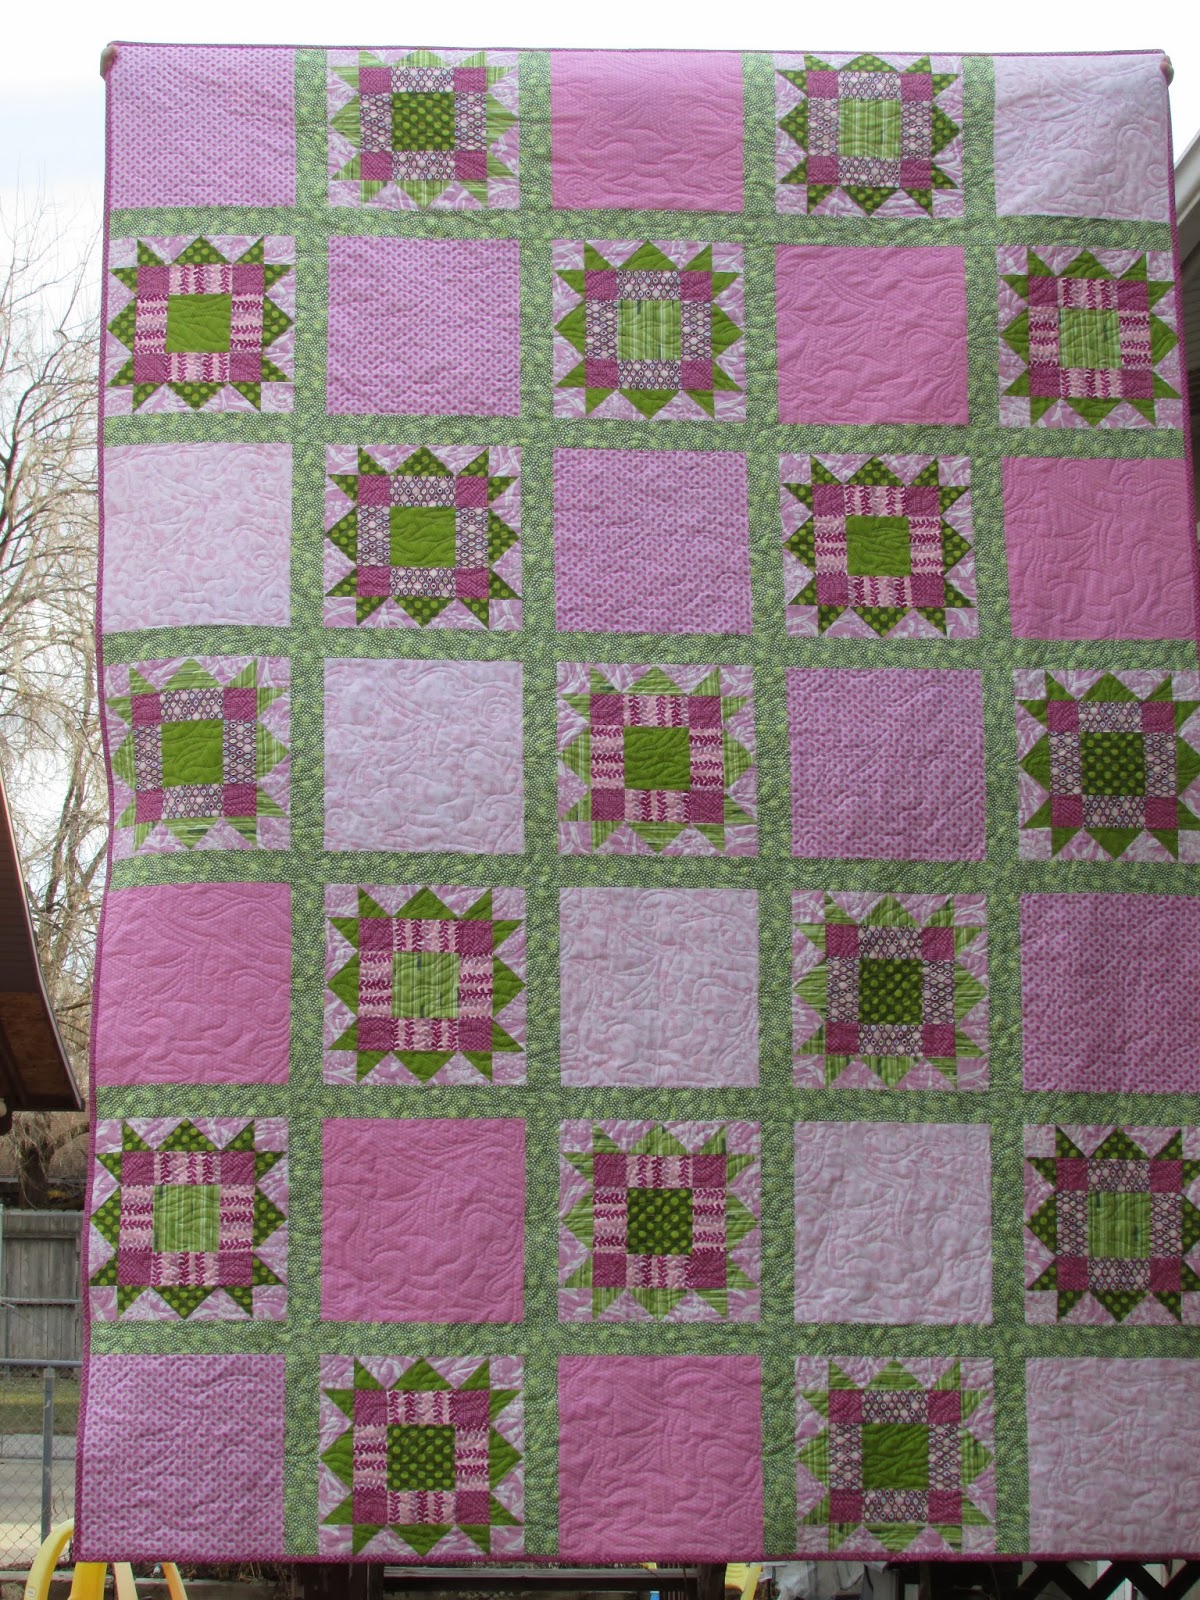
I made this for my 9 year old niece, who is a big dragon fan. My sister suggested "pinks, purples, and dragon-y greens." I ended up with purplish pinks and I like it. I tried to choose fabrics that reminded me of castles (brick fabric from Kate Spain's Central Park line) or dragon scales. 
 This is a big quilt. It's 68" by 96". I was originally planning on no sashing and a green border, but when I had it all laid out it was way too pink. Putting the green in between the blocks made a big difference. However, that made the quilt bigger than expected. I was still planning to add a border, but it would have been WAY too big for a twin size bed, so I just left it off. I'm not a huge fan of sewing borders on, so that was fine with me.

The blocks are from Don't Call me Betsy's Weathervane Block tutorial. They alternate with plain squares that I quilted dragons into. More info on the dragons can be found here in my previous post.
 I quilted flames and curling smoke coming out of the dragons' mouths. I love how this turned out.
The pink fabric to the left of this pieced block is the one that looks most like dragon scales to me--it has geometric hearts on it, and they look so much like scales! I was really happy to find that one.
I hope my niece loves it! I've been working on this off and on for over 4 months, and it feels so good to have it done.
I'm linking up today to Finish it Up Friday and Link a Finish Friday.

Wednesday, February 19, 2014

WiP: Quilted Dragons

I FINALLY got my niece's quilt all quilted this week. She loves dragons, and has for a long time, so I put dragons in all of the plain squares. My sister (her mom) is an amazing artist, and designed this motif for me. She's looking into selling PDF's of her designs.
 I did freehand flames and curling smoke coming out of the dragons' mouths over the pieced blocks. I love how it turned out!
I finished the quilting yesterday, and now all I have to do is bind it and this will be DONE! More pictures soon! I set aside the x-strings for a bit as I have some other deadlines right now, but I'm close to the quilting stage for that one too.

Linking up to Work in Progress Wednesday at Freshly Pieced.

Wednesday, February 5, 2014

WiP: Removing Paper /How Should I Quilt This?

I haven't done much paper piecing in the past but chose to have members of my local Salt Lake MQG bee make paper-pieced x-strings blocks for me last year. There were six of us who participated so we each made two blocks each month, and it went for six months. I was just waiting on one more block so I could put this together. The block I was waiting on was... MINE! I only made one block when I made the instructions to hand out, and finally made the other one a couple of days ago. My month was April, so it has been a long time. It feels good to be making progress on this again!
I got all twelve blocks sewn together and now I'm removing the paper from the center blocks. I'm leaving it around the edges until I get a border on. Some of the people removed the paper, which stretched the edges a little bit. It was tricky to get the edges to match up in a few places as a result, but it turned out okay despite one or two small tucks.
 I am LOVING this. I'm really looking forward to getting it done.

I'm planning to add a narrow white border around the outside, then a super-wide border of this matching print around that. It will be about 18 inches wide. The large border will make it into a twin-size quilt. I'm adding the wide borders for a few reasons:
1. At 6'3" with a 6'7" husband, lap quilts only cover our laps. Small quilts don't cut it around here.
2. We need more spare twin-size quilts for the kids' beds in case of illness or whatever else might call for an emergency quilt.
3. I bought 5 yards of this print on a mega-good sale a year ago intending to use it as a backing, so I have plenty of fabric to do it.
I'm hoping that it "works" as a finished design.
 Now I'm debating how to quilt it? Should I custom quilt the blocks, or just do a quick allover design to get it done fast? I'm considering wavy lines, or possibly something geometric.

I'm also making a lot of progress on my niece's Christmas quilt. I know, it's February now, but it's getting there. I got all of the blocks sewn together along with sashing. I need to add one more border to the outside and then it's ready for quilting too. It was a bit windy outside when we tried to get a photo.
I also made two new pairs of pajama pants, so I've been really productive! It feels good to get so much done. I still don't have a lot of time, but I've been using more of the time that I have and feeling much better about things.

Linking up today to Work in Progress Wednesday at Freshly Pieced.

Saturday, January 25, 2014

Quilting Services Special Pricing!

Now that we are settled in to having a fifth family member I am ready to take on more quilting. I am offering a special, first-come-first served offer right now for half off custom quilting to three customers. Normal pricing for light custom quilting starts at $0.02 per square inch, and more detailed custom quilting, including stitch in the ditch, dense ruler work, and dense fillers are $0.03 per square inch. For three quilts, I will do the same work for half the cost--either $0.01 or $0.015 depending on the detail you want. Custom quilting includes anything with specific attention to the piecing, rather than just quilting a complete overall design on the whole quilt.

See some examples below.
Light custom quilting--two borders done with rulers, and an allover design in the center. Normally $0.02 per square inch. (The blue lines were removed.)
 More light custom quilting can be seen here .

Medium Custom Quilting--this example has dense quilting but no ruler work or stitch in the ditch. May also include less dense designs with some ruler work. Normal price $0.025 per square inch.

Heavy Custom Quilting: Appliques outlined using rulers, dense fillers. Normally $0.03 per square inch.
More heavy custom quilting can be seen here.

If interested please shoot me an email at thequiltingmill@yahoo.com.
Related Posts Plugin for WordPress, Blogger...