Last week I finally had the opportunity to drive down to Let's Quilt in St. George, UT for the official training on my Innova longarm machine. I've had it for 6 months now, so it's high time I did that!
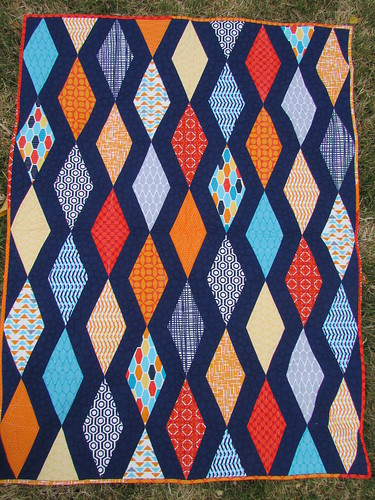
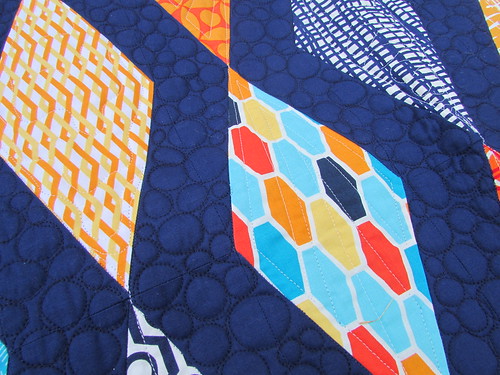
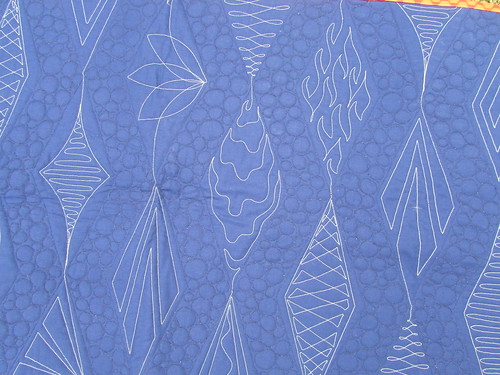
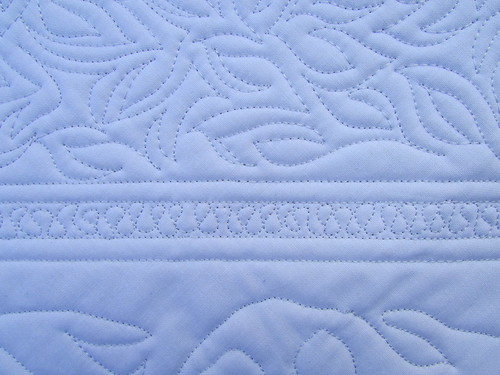
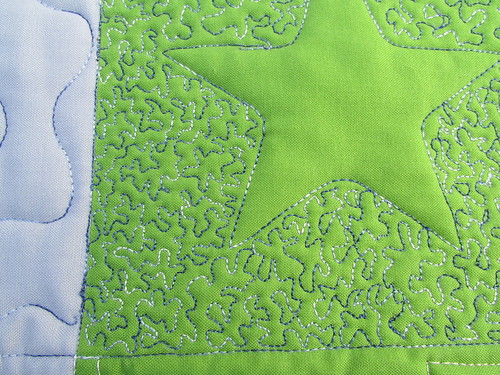
The first morning we spent about 3 hours talking about batting, thread, and tension. Then we loaded our first quilts of the week. I made this top about 5 years ago in a workshop, and it has been sitting in a drawer ever since. It measures 52" square.
We put pantographs on these quilts the first day. I have only done freehand work before and hadn't actually tried following a pantograph before. It definitely does take some practice to follow the lines with the laser light. I don't *love* doing pantos, but they certainly do have a place. I bought two while I was there that are patterns that would be hard to freehand accurately. One that I purchased was the same one I put on this quilt, called "Trumpet Vine." I used red thread on this one to repeat the red in the border. I think it looks very pretty! I probably would have used black thread, but when I finished the top at the workshop 5 years ago, a woman there looked at it and said, "Please tell me you're going to quilt that with red thread." I thought it was a great idea, and I love how it turned out.
The second morning started with maintenance. We learned how to re-time the machines and do other basic maintenance to keep them in top working condition. I really appreciate how the Innova machine is so easy to care for, although timing can be a bit of a pain.
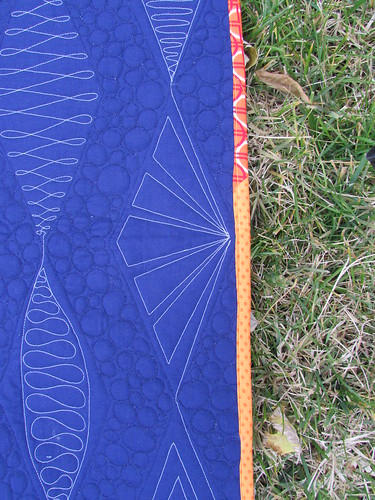
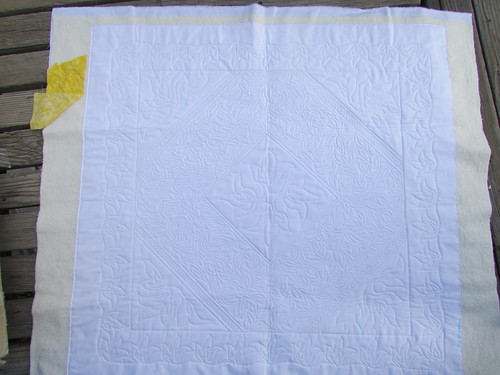
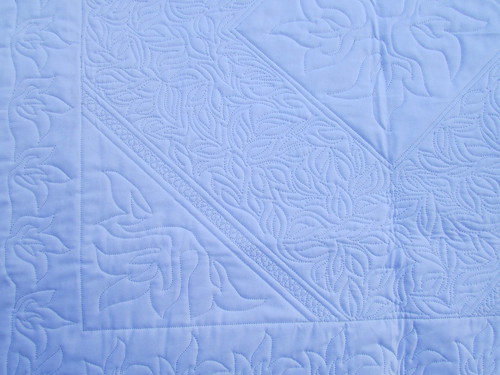
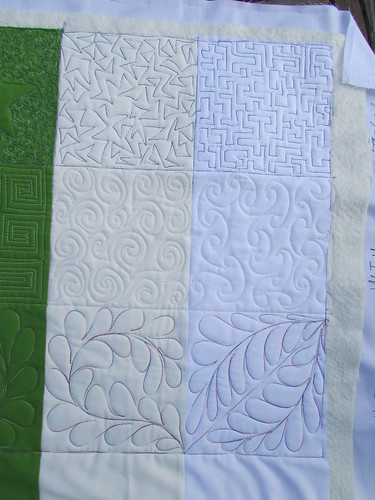
In the afternoon we did custom quilting on wholecloth quilts. We started with a 36" square top, and added a square to create "borders." We learned how to use pantographs and space them properly to fit into the borders. Then we put in corner triangles and learned how to place a motif into a specific location. From there we had a few more motifs to choose from, and we got to design the rest however we wanted to.
I added one more motif in the center, outlined it with a square on point, and added in some little extra borders. I filled in the rest with a freehand leaf filler that kind of echoed the motif shape, although it was simpler.
My fabric was white and I chose to use a silver Glide thread. It doesn't really show in the photos, but it was so pretty!
I had SO MUCH FUN getting to decide how to fill all the space. I especially loved putting in multiple rows of quilting with a tiny filler in between. It was tricky to do that particular design at a 45 degree angle--I need to practice that one some more =)
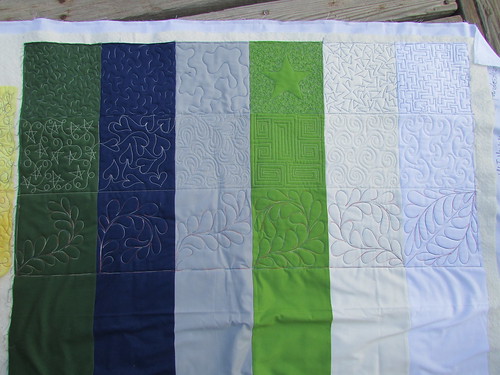
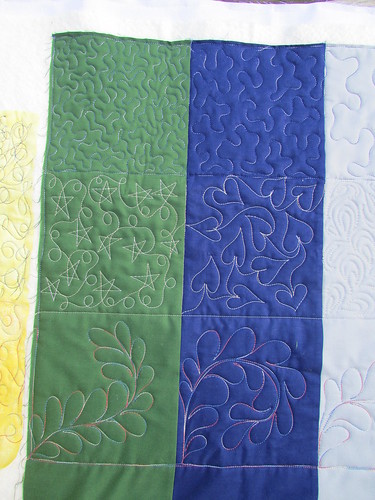
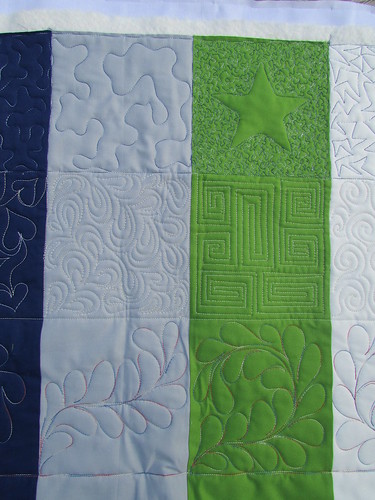
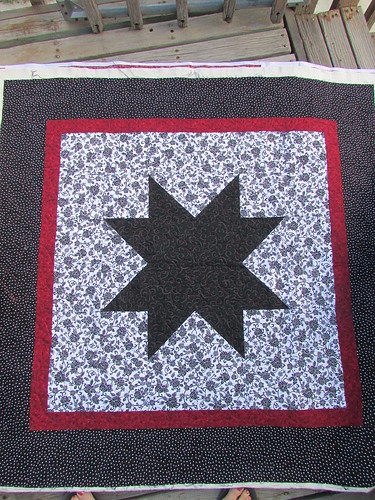
The third day was spent entirely on learning fillers. We were instructed to bring a top made of six 6.5" wide strips. On each row we chose a different kind of thread to see how we liked it. I used all variegated threads, with Fantastico on top, YLI Variations in the center, and King Tut on the bottom. All three threads worked nicely for me, although I usually prefer solid thread. It was fun to try thread that I don't own. On the first row we did stippling/meandering in four different sizes and two different shapes. The second row was various fillers, and the third row we practiced feathers.
We learned some good tips for maintaining the spacing on the meandering.
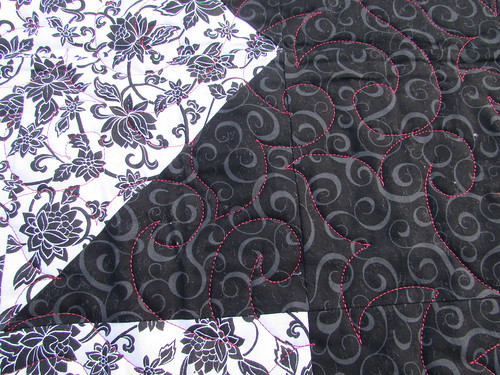
I loved the two fillers we did on this row. I've done paisley before, but it's just pretty. The geometric was a lot of fun to do--it was a fun challenge to fill the space.
Microstippling was a lot of fun, although a little stressful. It looks kind of splotchy with this variegated thread. We tried a few different kinds of microhandles, and I chose the ones I want. I'm hoping Santa brings them to me for Christmas. =)
It was fun to do all of the different designs. I certainly liked some better than others. The last one on the center row wasn't my favorite.
I had to unpin my sampler and go home before getting to add any more rows, but I did stick around for some more demonstrations. It was a 5 hour drive home and I left at 5:30. I have no idea how late people actually stayed that night, but I bet it could have been 7:00. My husband needed to go back to work the next day, so it was important for me to get home. I'm so glad he could take a few days off to stay with the kiddos while I got to go do this. It was kind of my last big break before the baby comes as well, which was really nice. I'll admit my ankles were pretty swollen after a five hour drive home though!
I had a great time at the training, but it was so good to come home. I'm excited to try some new skills on real quilts!